11 Ekim 2012 Perşembe

Cranberry Chicken

To contact us Click HERE
As I've mentioned earlier, in preparation for our new baby's arrival, I made lots of freezer meals.  They've been so wonderful to just pull out of the freezer the night before, let it thaw in the fridge until I need it the next day.  Then I just warm the food up, get a few sides ready quickly, and PRESTO...dinner's ready.  
It's been a real lifesaver with the new baby, lots of homework, five days of baseball practices and games, scouts, dance and recitals, and so on.
These would be super useful even if I didn't have a new baby.  I have many, many days where I'm so busy, I can't spend a lot of time on dinner.
Today's recipe comes from one of my favorite cookbooks that is made up solely of freezer meal recipes.  It's called "Dinner is Ready" by Deanna Buxton.
At first I was a little worried that my kids would freak out about the cranberries in this dish, but they didn't even notice the few cranberries that hadn't cooked down.  Everyone actually loved this dish!

Try out this super simple freezer meal.  You'll love having something handy on day you're busier than a bee!
Here's what you'll need:
4-6 boneless, skinless chicken breasts, cut into strips1 (16 oz.) can whole berry cranberry sauce1 C. creamy French dressing1 envelope onion soup mix, dry
Place chicken in a greased 9x13-inch baking dish and season with salt and pepper well.


In a bowl, combine the cranberry sauce, French dressing, and onion soup mix.

Pour over chicken.

Bake uncovered at 350 degrees for 45 minutes.  Remove from oven and allow to cool.  Place in a gallon freezer bag.  Label and freeze.

To serve: Thaw.  Heat until hot throughout.  Serve with rice.
When I used this freezer meal, I thawed this and dumped everything in the gallon freezer bag into a crockpot.  Then I just turned it on High and let it heat through in that for a few hours.

You can assemble this recipe and freeze it before baking it.  In that case, thaw and bake uncovered at 350 degrees for 45 minutes.  Super simple!

BBQ Meatballs

To contact us Click HERE
Well, hello!  It's been a while since my last post; sorry for that!  But we've been having a wonderful time the last couple of weeks celebrating the fourth and spending time with out-of-town visitors.  I love summertime!!
So, I just took a look at the pictures of things I've made that are waiting to make their appearance here and I noticed that I have LOTS of yummy goodies and treats and just a few dinners.  Can you tell what I enjoy making more?  But, hey, who doesn't?!
Anyway, today's recipe is one of the few dinners I've had patiently waiting.
                                    
This recipe comes from my friend, Holly.  I so look up to her!  She's a gorgeous, genuine person, a fantastic mother, she's has an amazing creative talent, and she's a wonderful cook.  She's totally the perfect woman!
I made these meatballs as one of my freezer meals and they were GREAT!  Everyone highly approved.
Here's what you'll need:
3 lbs. ground beef1 1/2 C. milk OR 1 (12 oz.) can evaporated milk1 C. oatmeal1 C. cracker crumbs (I used Ritz crackers that I smashed)2 eggs1/2 C. chopped onion OR 2 Tbsp. dried chopped onion1/2 tsp. garlic powder2 tsp. salt1/2 tsp. pepper2 tsp. chili powder
Sauce:2 C. catsup1 C. brown sugar1 Tbsp. liquid smoke1/2 tsp. garlic powder1/2 C. chopped onion OR 2 Tbsp. dried, chopped onion
Combine all of the sauce ingredients in a medium bowl and mix well.


Set aside.
In a large bowl, combine all of the meatball ingredients, except for the ground beef.

Crumble the ground beef on top.

Mush everything together until all of the ingredients are evenly combined. 

Using a small scoop (or about 2 teaspoons), form meatballs and place on two large, greased baking pans.

 I ended up with about 100 meatballs.

Pour the sauce over the meatballs in ONE pan.  If you want to cover all of the meatballs (in both pans), DOUBLE THE SAUCE.
I loved that I had one pan of BBQ meatballs and another pan of plain meatballs that I can just throw into some marinara sauce for spaghetti and meatballs.
Two great dinner options from this one recipe.  Love that!

Bake at 350 degrees for 1 hour.

At this point, you can either serve the meatballs from the oven or you can let them cool and dump the meatballs and sauce into a freezer ziplock bag and freeze them.
If you freeze these, just let them thaw, then heat them up and you're ready to eat!

I also froze the plain meatballs after they finished baking (at 350 degrees for 1 hour) and cooled.
I love having delicious food I can just pull out of the freezer, warm up, and eat.  It makes my life so much easier!
I hope I'm making your life easier too!!  Enjoy!

Skor Bar Cake a.k.a. Better Than Anything Cake

To contact us Click HERE
I'm one lucky girl.  
I have a mother-in-law who loves and supports me in all of my cooking, baking, catering, and selling ventures.

She recently had a birthday and can you guess what I like to do for birthdays?
That's right.  I bake.

She and my father-in-law are empty nesters and he still works full-time on their potato farm.
I worried she might not get a birthday cake, so I took care of that for her.

This cake is very special to me.  First of all, I'd never had this cake until I'd married into the family.  My wonderful mother-in-law so kindly introduced me to it.
I'm forever grateful!  It's so absolutely delicious and simple to make!!

Here's what you'll need:
Your favorite chocolate cake (I made mine from scratch)Caramel ice cream topping (I like Mrs. Richardson's the best)Cool Whip1 Skor Bar or 1 Heath Bar (any chocolate covered toffee bar really), chopped

Since I was making this for my mother-in-law, I wanted to make her cake a mini one, hence the smaller size. But you can make this any way you want.  I usually see this just as a single layer in a 9x13-inch pan.
If you're making a larger size, you'll need more than one Skor Bar.
Poke holes into the top of your chocolate cake to help the caramel soak into the cake better.

Cover with caramel topping.

Add some chopped Skor Bar.

Place another layer of chocolate cake on next.  Poke with holes (I used a wooden kabob skewer) and top again with caramel topping.

Let it drip down the sides a little.  Yum.

Dollop some Cool Whip on and drizzle with more caramel topping.

Then finish it off with more chopped Skor Bar.

Doesn't that just look amazing?

This flavor combination is fantastic, thus earning it's title of "Better Than Anything Cake."

It is that good.

Hawaiian Chicken

To contact us Click HERE

I think that it's kind of funny that as I'm cooking things, my kids always ask if what I'm making is for us.  I hope that's a sign that I'm teaching my kids how to help others.
In this chapter of my life, I can't really go and help someone move or help to take care of a new baby.  Bringing all five of my kids as I go to help would more of a hindrance than a help.
So what can I do to help others out?  I cook for them.  That's something I can do from home with all of the kids around me and still be able to help someone in need.
Today's dish is a great one for that!  My friend, Emma, is due to have her first baby any time now and you all probably know how much I love freezer meals when I have a new baby.  So, in hopes to help her out when the new bundle of joy arrives, I've been making freezer meals for her.
This is the one that I made for her today...


The recipe comes from one of my favorite sources for freezer meals, Deanna Buxton's "Dinner Is Ready."  It's very similar to her Cranberry Chicken, but my family likes this dish even more.
Here's what you'll need:
6 boneless, skinless chicken breasts (you can cut these into tenders if preferred)salt, pepper, and garlic powder, to taste1 C. Apricot Pineapple preserves1 C. Russian salad dressing1 envelope onion soup mix, dry
Season the chicken breasts with salt, pepper, and garlic powder.  
Place in a greased 9x13-inch pan.  

In a medium sized bowl, combine the preserves, salad dressing, and dry onion soup mix. 


Pour over the chicken. Bake at 350 degrees for 45 minutes.  


At this point, you can serve warm over rice OR you can let it cool, then place it in a gallon ziploc bag that's been labeled, and freeze.

If you freeze this dish, just let it thaw then heat it up when you're ready to eat it.

Chocoflan

To contact us Click HERE
There's not a whole lot that I know about Mexico.  Well, except for the fact that I LOVE to vacation there.  And that I LOVE Latin music.  And that Latin dancing is my FAVORITE.  Oh, and there's the food.

Oh, the food.

I really can't get enough of Mexican food.  I love, love, LOVE it!!

But there are so many Mexican specialties that I have yet to try.

When we had our baby, my brother's roommate's fiance, Paulina (did you follow that?), made us the most incredible cake.  I had no idea what it was, but it looked amazing!


When my brother came over to visit, I showed it to him.  His eyes lit up and he told me it was called "Chocoflan."  He proceeded to tell me what an incredible cake it was and that it's very popular in Mexico, where he had been living for almost two years.
When we tried it, I just about died!  It was SO INCREDIBLY GOOD!!!!  It has caramel studded flan on top and a moist chocolate cake on the bottom.
Amazing.  Absolutely amazing.
As the kids were eating their slices, I asked them how they liked it.  My two-year-old stood up on his barstool and yelled at the top of his lungs, "I LOVE IT!!!"
It was a big hit at our house, to say the least.
I asked Paulina if she could teach me how to make it.  She so kindly came over and walked me through it, and I was so surprised at how EASY it was to make!
So, now I will walk you through it.  And I'm sure you'll be just as shocked at how simple it is to make such an amazing, authentic Mexican dessert.
Here's what you'll need:
1/2 C. cajeta or dulce de leche1 C. sugar1 (12 oz.) can evaporated milk1 (8 oz.) pkg. cream cheese, softened4 eggs1 tsp. vanilla
1 chocolate cake mix (made as directed on the box)1/2 C. sour cream
Spray a bundt pan very well with non-stick spray.  In the bottom of the bundt pan, pour your cajeta or dulce de leche in a random, sporadic way.  Like this...

There is no cajeta in our small town, so Paulina recommended this kind of dulce de leche.
When I looked closely at the bottle, it shows that you can use this on pancakes.  We are so going to try that!

In a bowl, beat the sugar, evaporated milk, cream cheese, 4 eggs, and vanilla.  I've also read that you can do this step in a blender if you would rather have a more smooth texture to the flan.
Set aside.


In another bowl, make the chocolate cake mix according to the package instructions, adding 1/2 cup of sour cream.
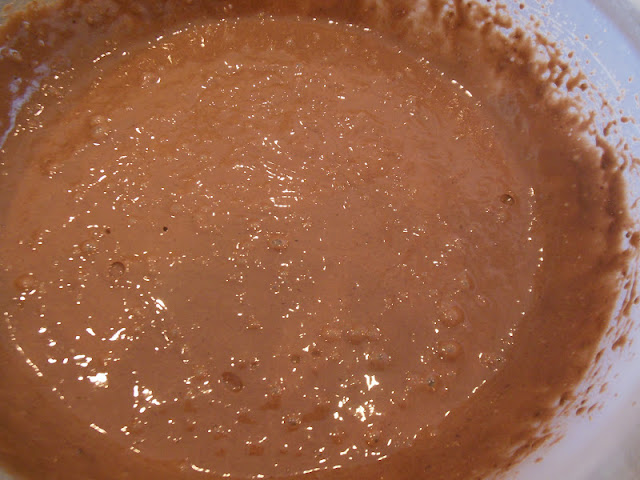
Get ready to fill your bundt pan.


Pour your chocolate cake batter into your bundt pan, on top of the cajeta or dulce de leche.


Using a ladle, gently ladle the flan mixture on top of the chocolate cake mixture.


Spray a piece of foil with non-stick spray and cover your bundt pan with the foil, sprayed side down.


Place the bundt pan in a larger roasting pan.  Fill the pan with water until it comes almost 1/2 way up the sides of the bundt pan.
This is called a water bath.


Bake at 350 degrees for 1 1/2 hours or until a toothpick inserted into the cake comes out clean.


Chocoflan is also called "The Impossible Cake" because it does the impossible while baking.  The flan and the chocolate cake switch places.  It's so cool!
Cool in the pan on a cooling rack until it's cool enough to put in the fridge.  Then cover with plastic wrap and refrigerate it for at least two hours, but preferably overnight.


After it has fully chilled, invert onto a plate or serving platter.And this is what it looks like...


So, so, so, SO incredible!!!Thank you, Paulina, for teaching me!

10 Ekim 2012 Çarşamba

The Latest Dirt.....

To contact us Click HERE
(inside).....what's up at your digs?
Gosh....I just can't resist a good, silly pun every now and then. Being away for so long, I have lots of gossip...oops...I mean necessary information I'm needing to catch up on with friends I haven't spoken with lately.
I think this is pretty CAS.  I used the digital stamp Mud Pig from Doodle Pantry.  I also employed MFT's Wood Grain Fence, along with my own shovel svg.  Some stitching, pop-ups, distressing, copics, scrap paper from a friend and I call it done.  I promised myself I would mail both .... tomorrow!
I'm entering this in Link Up For Pink Challenge (use pink), the CDAC Progressive Challenge #21 (use this pig from Doodle Pantry and the monthly Doodle Pantry Challenge #28(use any image.)  Makes this girl happy!!!
I apologize for the bad lighting on these 2 cards

A2, vertical...2 scenes a tad different

Winter Scene with Doodle Pantry

To contact us Click HERE
I'm still liking the warm weather because that's the kinda gal I am, but I wanted to try my first challenge at Joan's Garden . It required: a winter theme, a stamp, a die and a tree.  Hummmm...think I have those.

I merged two files (to make my scene) from Doodle Pantry...Winter Wishes and Snow Birdie. I used the Poppystamps window die, Memory Box "Twigs and Berries" die, Silhouette Store bird and bow cut files.

I made the garland in Silhouette.  If you have a Silhouette machine, I will be happy to send you the file.  I haven't made into svg format yet. Find my email under "Have a question for me?"

A2, stitching, glitter and lots of pop-ups for dimension

Side view to help show some of the depth